When it comes to simple ways of improving the flavor of your rustic artisan sourdough, there’s one ingredient that never fails to disappoint; the Italian herb rosemary.
Homemade bread is amazing in and of itself. However, learning you can enhance your sourdough baking by easily adding in flavors is next level happiness.
Fortunately herbs are generally cheap and accessible to anybody. It makes their addition to your baking that much more enjoyable. Herbs can drastically change the taste, making your bread very adaptable to a massive assortment of flavor profiles.
Best food and flavor pairings
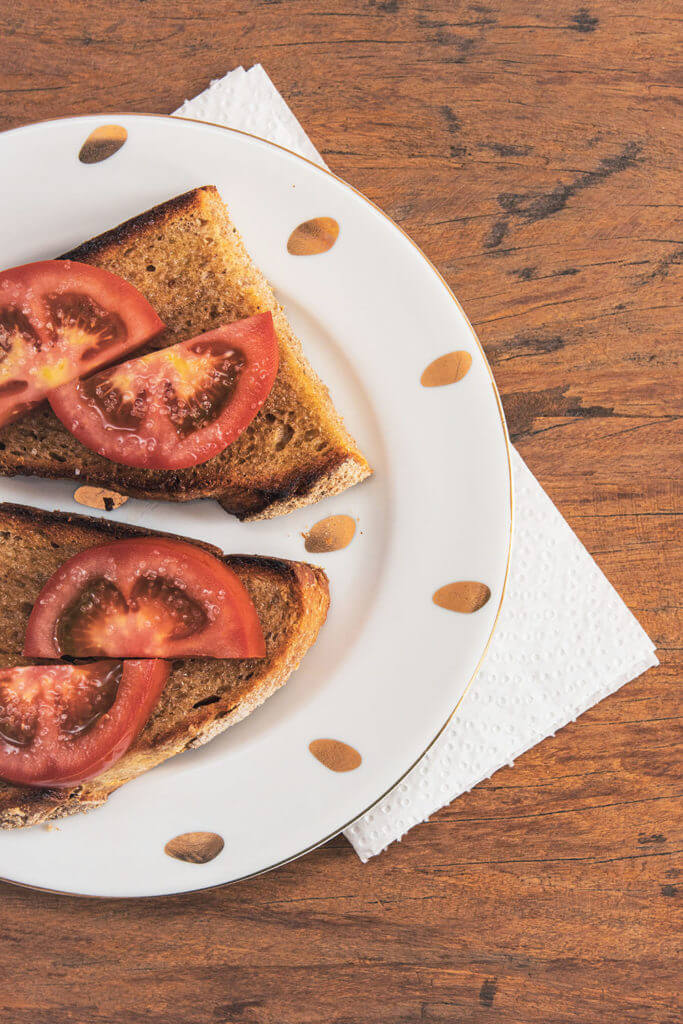
Rosemary sourdough pairs very well with many things. For starters, it produces amazing toast that can be spread with butter, fresh tomatoes, basil and optionally drizzled with a little olive oil (basically bruschetta). Bruschetta can come in many forms, and rosemary sourdough is ready for just about any one of them.
It serves alongside nearly any pasta, grilled meat, or veggies. Many salads, soups, or even spicy chili make for good combos too.
Ideal cheese pairings are mozzarella, parmesan, feta, brie, goat cheese, cheddar, and others. You can also dip in hummus, baba ganoush, or olive tapenade.
Why it’s easy to make
Many artisan bakers have a favorite blend of flours they use for their bread. It’s generally a good idea to mix these together before adding in water. This way, there are no sections or clumps of one specific flour. I’ve found adding in rosemary is best done while mixing the dry flour together.
Mixing it in with your dry ingredients: 1.) helps add the most flavor, 2.) contributes to much of the rosemary actually dissolving into the dough, 3.) saves the trouble of trying to add ingredients to a solidified dough.
Because you can mix in rosemary straight away means that you need not remember adding it at a later point. It doesn’t change the difficulty of mixing your dough, stretching and folding it, or shaping it. It doesn’t even affect the bake process. Very simple.
Additional ingredients you can mix in with rosemary
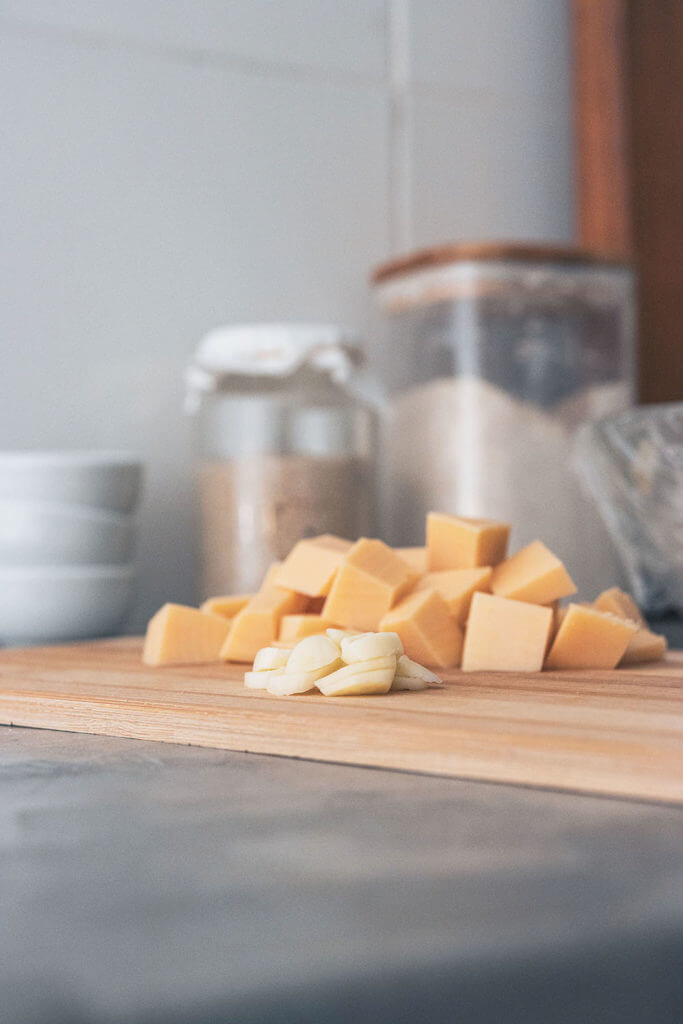
Rosemary itself is certainly my go-to choice for adding extra flavor to my bread. If I have extra time and energy, my other favorite ingredients to include with rosemary are garlic and white smoked cheddar cheese.
For mixing in garlic, I prefer thinly slicing cloves and not using powder. Yes, those slices are often found in the bread, however, nearly all of the strong garlic flavor dissipates into the rest of the bread, evening it out.
One or two cloves of garlic seems to be optimal for an average sized loaf. Unless you’re using gigantic Russian garlic or you can’t handle the strong taste too much. In that case, use it sparingly. Maybe half a clove per one loaf.
Adding cheese to bread is a total no brainer. Everybody likes cheese in their bread, pizza crust, or whatever. Okay, maybe there’s a few exceptions. Smoked cheddar tends to compliment the garlic and rosemary quite well.
I have had the most success cutting cheese up into cubes. Perhaps a little smaller than a large hashbrown. So maybe half an inch squared. If you cut them up too small, you won’t find cheesy pockets of goodness because they’ll have melted away. If you’ve never added any in, cheese can be a little tricky to deal with in dough. The small cubes often want to fall out, so you have to watch that they don’t go flying across your kitchen! For one loaf, I have found somewhere between 100-150 grams to be a good amount.
You can mix the garlic and smoked cheddar at the same time you’re mixing in the rosemary; with the dry flour.
Is rosemary sourdough a healthy type of bread?
Sourdough bread is among the healthiest types available. This is because of the fermentation process that begins from the sourdough starter. During this process, more nutrition is unlocked from the flour, and the bread is made more digestible than typical bread.
According to some sources online, the addition of one teaspoon of rosemary in cooking or baking has little to no nutritional benefit. Data shows that there are a some vitamins found in dried rosemary, but it’s unlikely there is any noticeable benefit from it’s addition in sourdough.
Seemingly, we can safely presume that rosemary sourdough verse normal sourdough is only minimally different. It would be interesting to know if rosemary loses or gains any of it’s nutritional properties through baking, or if it has any special interactions with sourdough culture.
What makes rosemary an Italian culinary herb?
Rosemary (or rosmarino in Italian) can be found growing wild in Italy and other surrounding countries. It’s a very hearty shrub related to the sage family and survive quite well in a range of climates and conditions. As such, rosemary leaves are found in many Mediterranean dishes.
Other herbs such as basil, thyme, oregano, parsley, and marjoram can also frequently be found in Italian foods. “Italian seasoning” is reportedly a creation of the US. It’s a basic blend of common dry Italian herbs, spices, garlic, and optionally a few extra things.
Dried herbs last a long time, making them convenient to have on hand for baking or cooking.
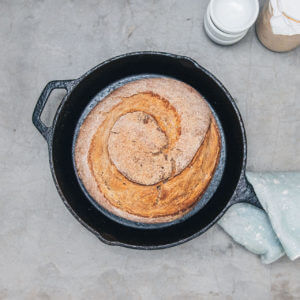
Rosemary Sourdough Bread
Equipment
- Mixing Bowl – Glass or Plastic
- Saran Wrap or Towel
- Baking Pan – Stone or Tin Pizza Pan, Cast Iron or Dutch Oven
- Kitchen Scale
Ingredients
- 75g Sourdough Starter
- 600g Flour Recommended: 80% White (480g), 20% Whole Wheat (120g)
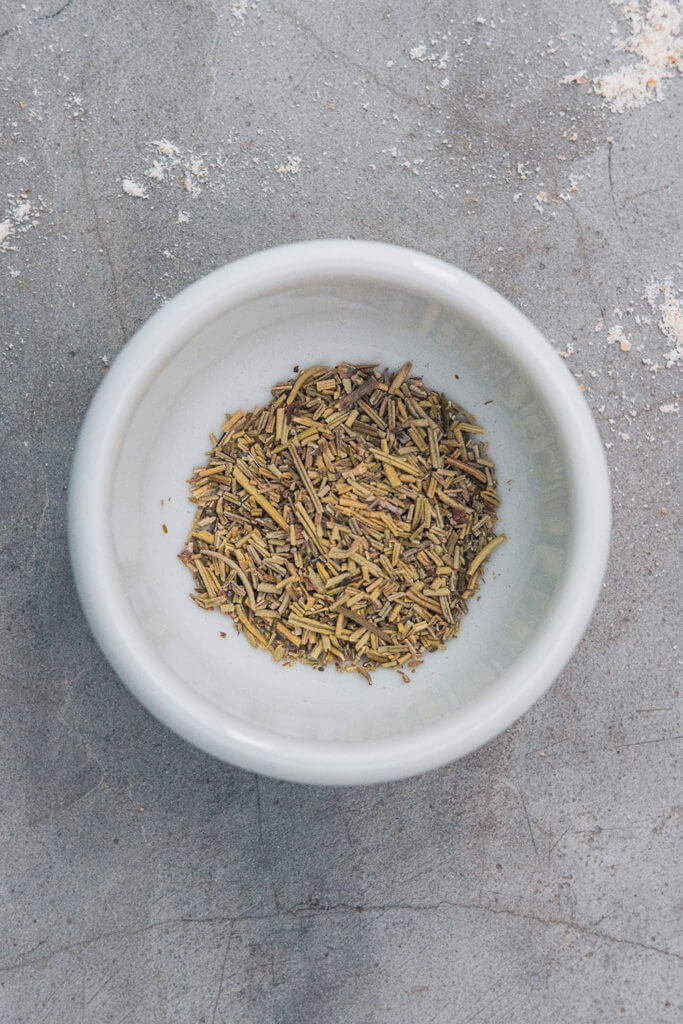
- 1 tsp Dried Rosemary
- 390g Water This is a 65% hydration level of water to your dry flour weight (it excludes the difference counted by a starter).
- 12g Salt This is 2% of your total dry flour weight. 12g of salt is close to 3/4 tablespoons.
Instructions
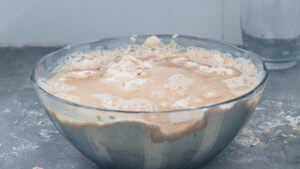
- In a bowl, mix 600 grams of flour and (approximately) 1 teaspoon of dried rosemary. Do not add salt yet!

- Add 390 grams of water to your mixing bowl.
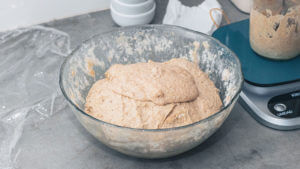
- Gently mix water and slowly form a ball of dough.
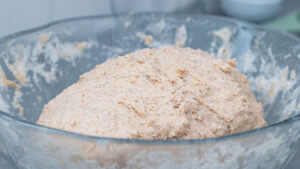
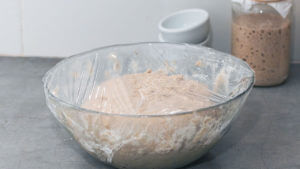
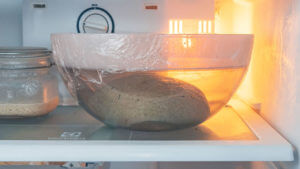
- Let dough autolyse for the recommended time of 1 hour. This allows gluten to form and bind together, strengthening the dough before fermentation starts. Optionally, you can let autolyse for as little as 15m, or as long as 8 hours. Adjust to your schedule. From practice, 45 minutes to 1 hour seems to achieve the best results. Cover bowl in saran wrap or damp towel during this process, and after the following steps too.
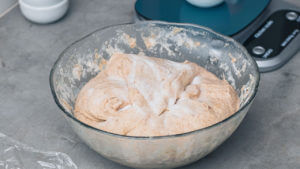
- Gently mix in 75g of active starter. Ideally use once your starter has peaked or doubled in size since its last feeding. Do not stretch or mix your dough so aggressively that it begins to break or tear.
- After 15 to 30 minutes of allowing your the dough to begin fermentation, mix in 12 grams of salt.Some bakers prefer to dissolve their salt into warm water, then spread into their dough. It's entirely up to you.
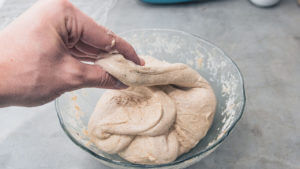
- While your dough is still in the mixing bowl, begin series of stretch and folds. It's a good idea to space them out every 30 minutes. Three sets of stretch and folds is usually adequate. You can accomplish this by pinching a part, then persuasively stretch that piece (without tearing the dough), and folding over and onto itself. Do this in about 3-4 places. This will help develop more strength in the dough. Toward the end of your stretch and folds the dough should be noticeably less prone to tearing.
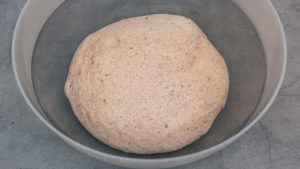
- Time to bulk ferment your dough! Let dough to sit while covered at room temperature for anywhere between 3-7 hours. The warmer your house is, the less time it will need. It's finished this process if; the dough has doubled in size, appears to be dome-shaped on the top, and has a smooth surface. There are lots of resources that exist if you're having trouble learning how to gauge this part. If it's winter where you live, and your house is quite cold, this process can easily take 12 hours. Many people in cold circumstances opt to prepare their bread at night, leave it on the counter overnight, and then bake in the morning.
- Once the dough has finished its bulk ferment, you have the option of further developing the taste through cold fermentation in the fridge. This can be 12 to 24 hours. The longer, the more developed the taste will be. It is possible to cold ferment for longer than this time-frame, however, you must be very familiar with the whole process and time things exceptionally well as to not over-proof.
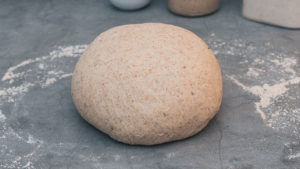
- Either after your bulk or cold ferment, it's time to shape your dough. Some choose to shape then place in a proofing basket before putting in the fridge for a cold ferment. Some choose to shape a little before baking. Proofing bannetons are nice, just not necessary. There are various shaping techniques that exist. The basic idea is to form a round dough with built up pressure. If there's no pressure built prior to baking, the bread may result in being flat. Too much pressure might make the bread too dense or not rise properly. If the dough didn't have a chance to build its gluten strength or if it over-proofed, it won't want to keep its shape. Even if you choose to shape immediately before baking, it's a good idea to let it rest for 5 to 15 minutes before putting in the oven as to avoid it being too dense. If it's having issues keeping any shape, don't let it rest. Simply shape, then throw in the oven and pray it won't become a pancake loaf.
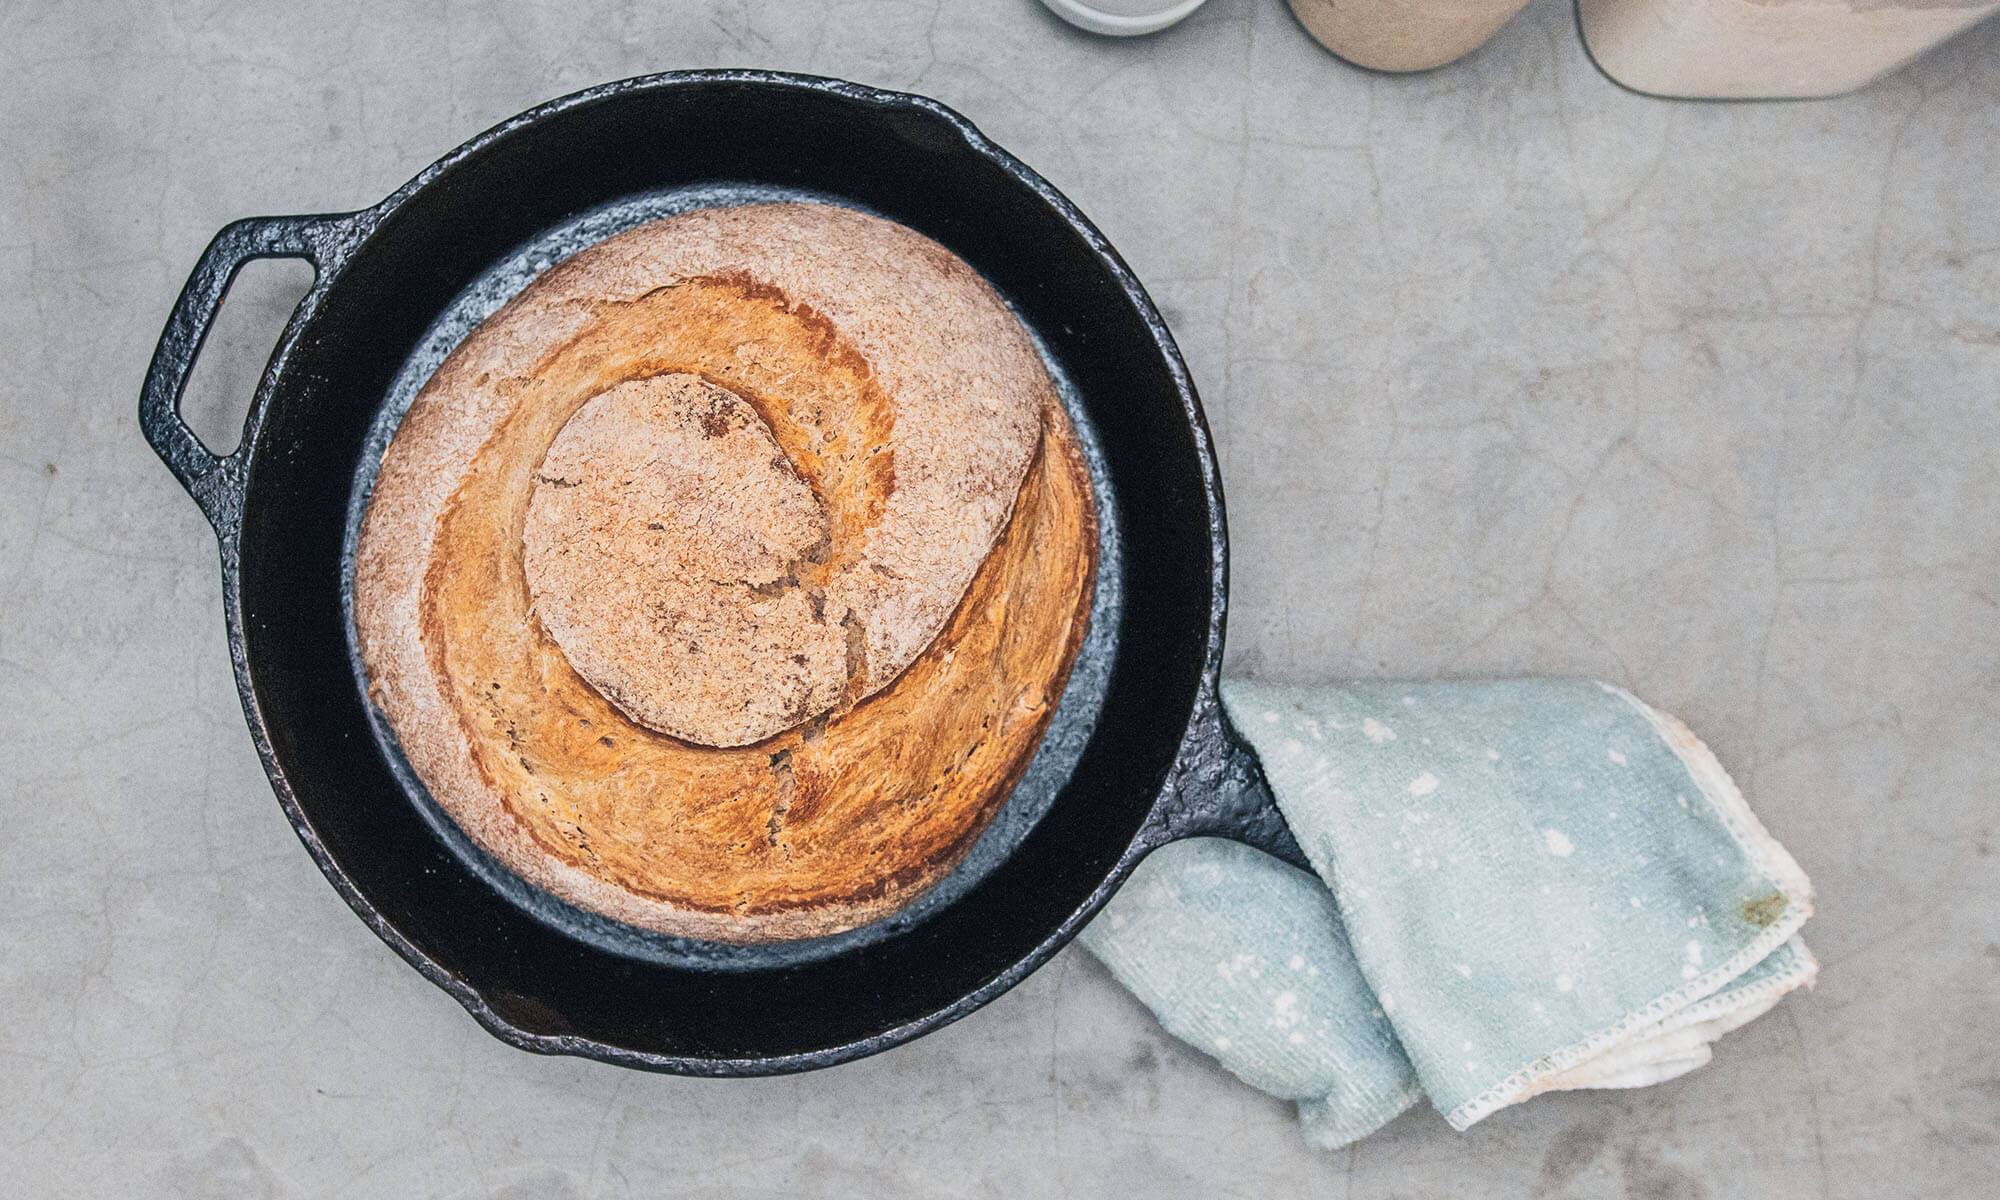
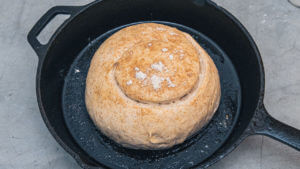
- First and optional: oil the surface of your dough, then lightly sprinkle flour over it. Second, and not optional: With a bread scoring knife, create at least one score just off center, or score in whichever pattern you like.A bread score allows steam to escape the dough while baking. Otherwise, you may risk the dough cracking or bursting in an undesired way while in the oven. Utility blades, sharp pocket knives, or kitchen knives can do a sufficient job, they'll be less pretty than a bread scorer. A bread scoring blade is slightly bent, giving you a curled "ear" on your bread crust.
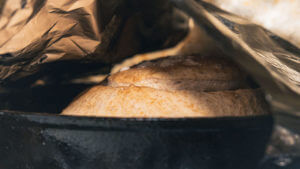
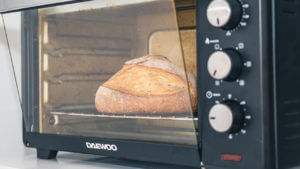
- Bake at 475° Fahrenheit (246° C) for about 1 hour. If your bread is dark golden on the top surface, or if it has reached an internal temperature of 94°-98° C (201°-208 F), then it is done. It may hit those temperatures in 30 minutes, or in 1.5 hours. Check regularly if it's your first time.475° for this length of time is a general guideline. You'll get the best results by paying attention to what your bread likes best from your oven. What bread is baked in or on and whether the oven was pre-heated sufficiently changes the bake time. The kind of flour used can also change what is needed. And the size of your loaf will affect the baking. You can bake on a stone or tin pizza pan, cast iron pan, or dutch oven. If baking with a dutch oven, line the inside with non-stick parchment and keep the lid on during the first part. You can remove the lid for the last 10-20 minutes to get a nice color on the top crust. If you don't have a steam-injection oven, nor a dutch oven, you can get successful results baking on a pan by doing the following: ensure tin foil is underneath the pan (shiny side down) to repel the direct heat from burning the bottom crust, and tenting the top of your bread with tin foil (shiny side outward) to repel direct heat from burning the top of your bread (even in a convection). You can remove the top tin foil 10-20 minutes before the end of the bake.
- Let bread rest for one hour. Allowing it to finalize itself on the inside. Otherwise it can be too gummy if you haven't waited.A great way to do this: rest it in the oven (while off) for the first 20 minutes keeping the door cracked. This helps the crust become a bit more crispy. Once done, allow it to sit on a baking rack for the final 40 minutes before cutting into it. Resting it on a flat sealed surface or storing in a bag before it has sufficiently cooled will drastically affect how crispy the outer crust is.

Following this recipe should provide you with good bread results. That being said, there are a lot of variables constantly at play with sourdough. No baker is perfect, even the experienced among us can fail to produce a good loaf once in a while. Check out our article on fixing flat sourdough if you are struggling to get a good rise out of your bread.
Leave a Reply